The Login With Crypto Wallets feature allows your WooCommerce users to log in or register on your website using their Web3 wallet (MetaMask, Trust Wallet, Coinbase Wallet, etc.). This makes the login process faster, more secure, and completely password-less.
Follow the steps below to access Login with Crypto Wallets section:
- From your WordPress dashboard, navigate to WooCommerce > MetaMask Pro > Settings > Login with Crypto Wallets.
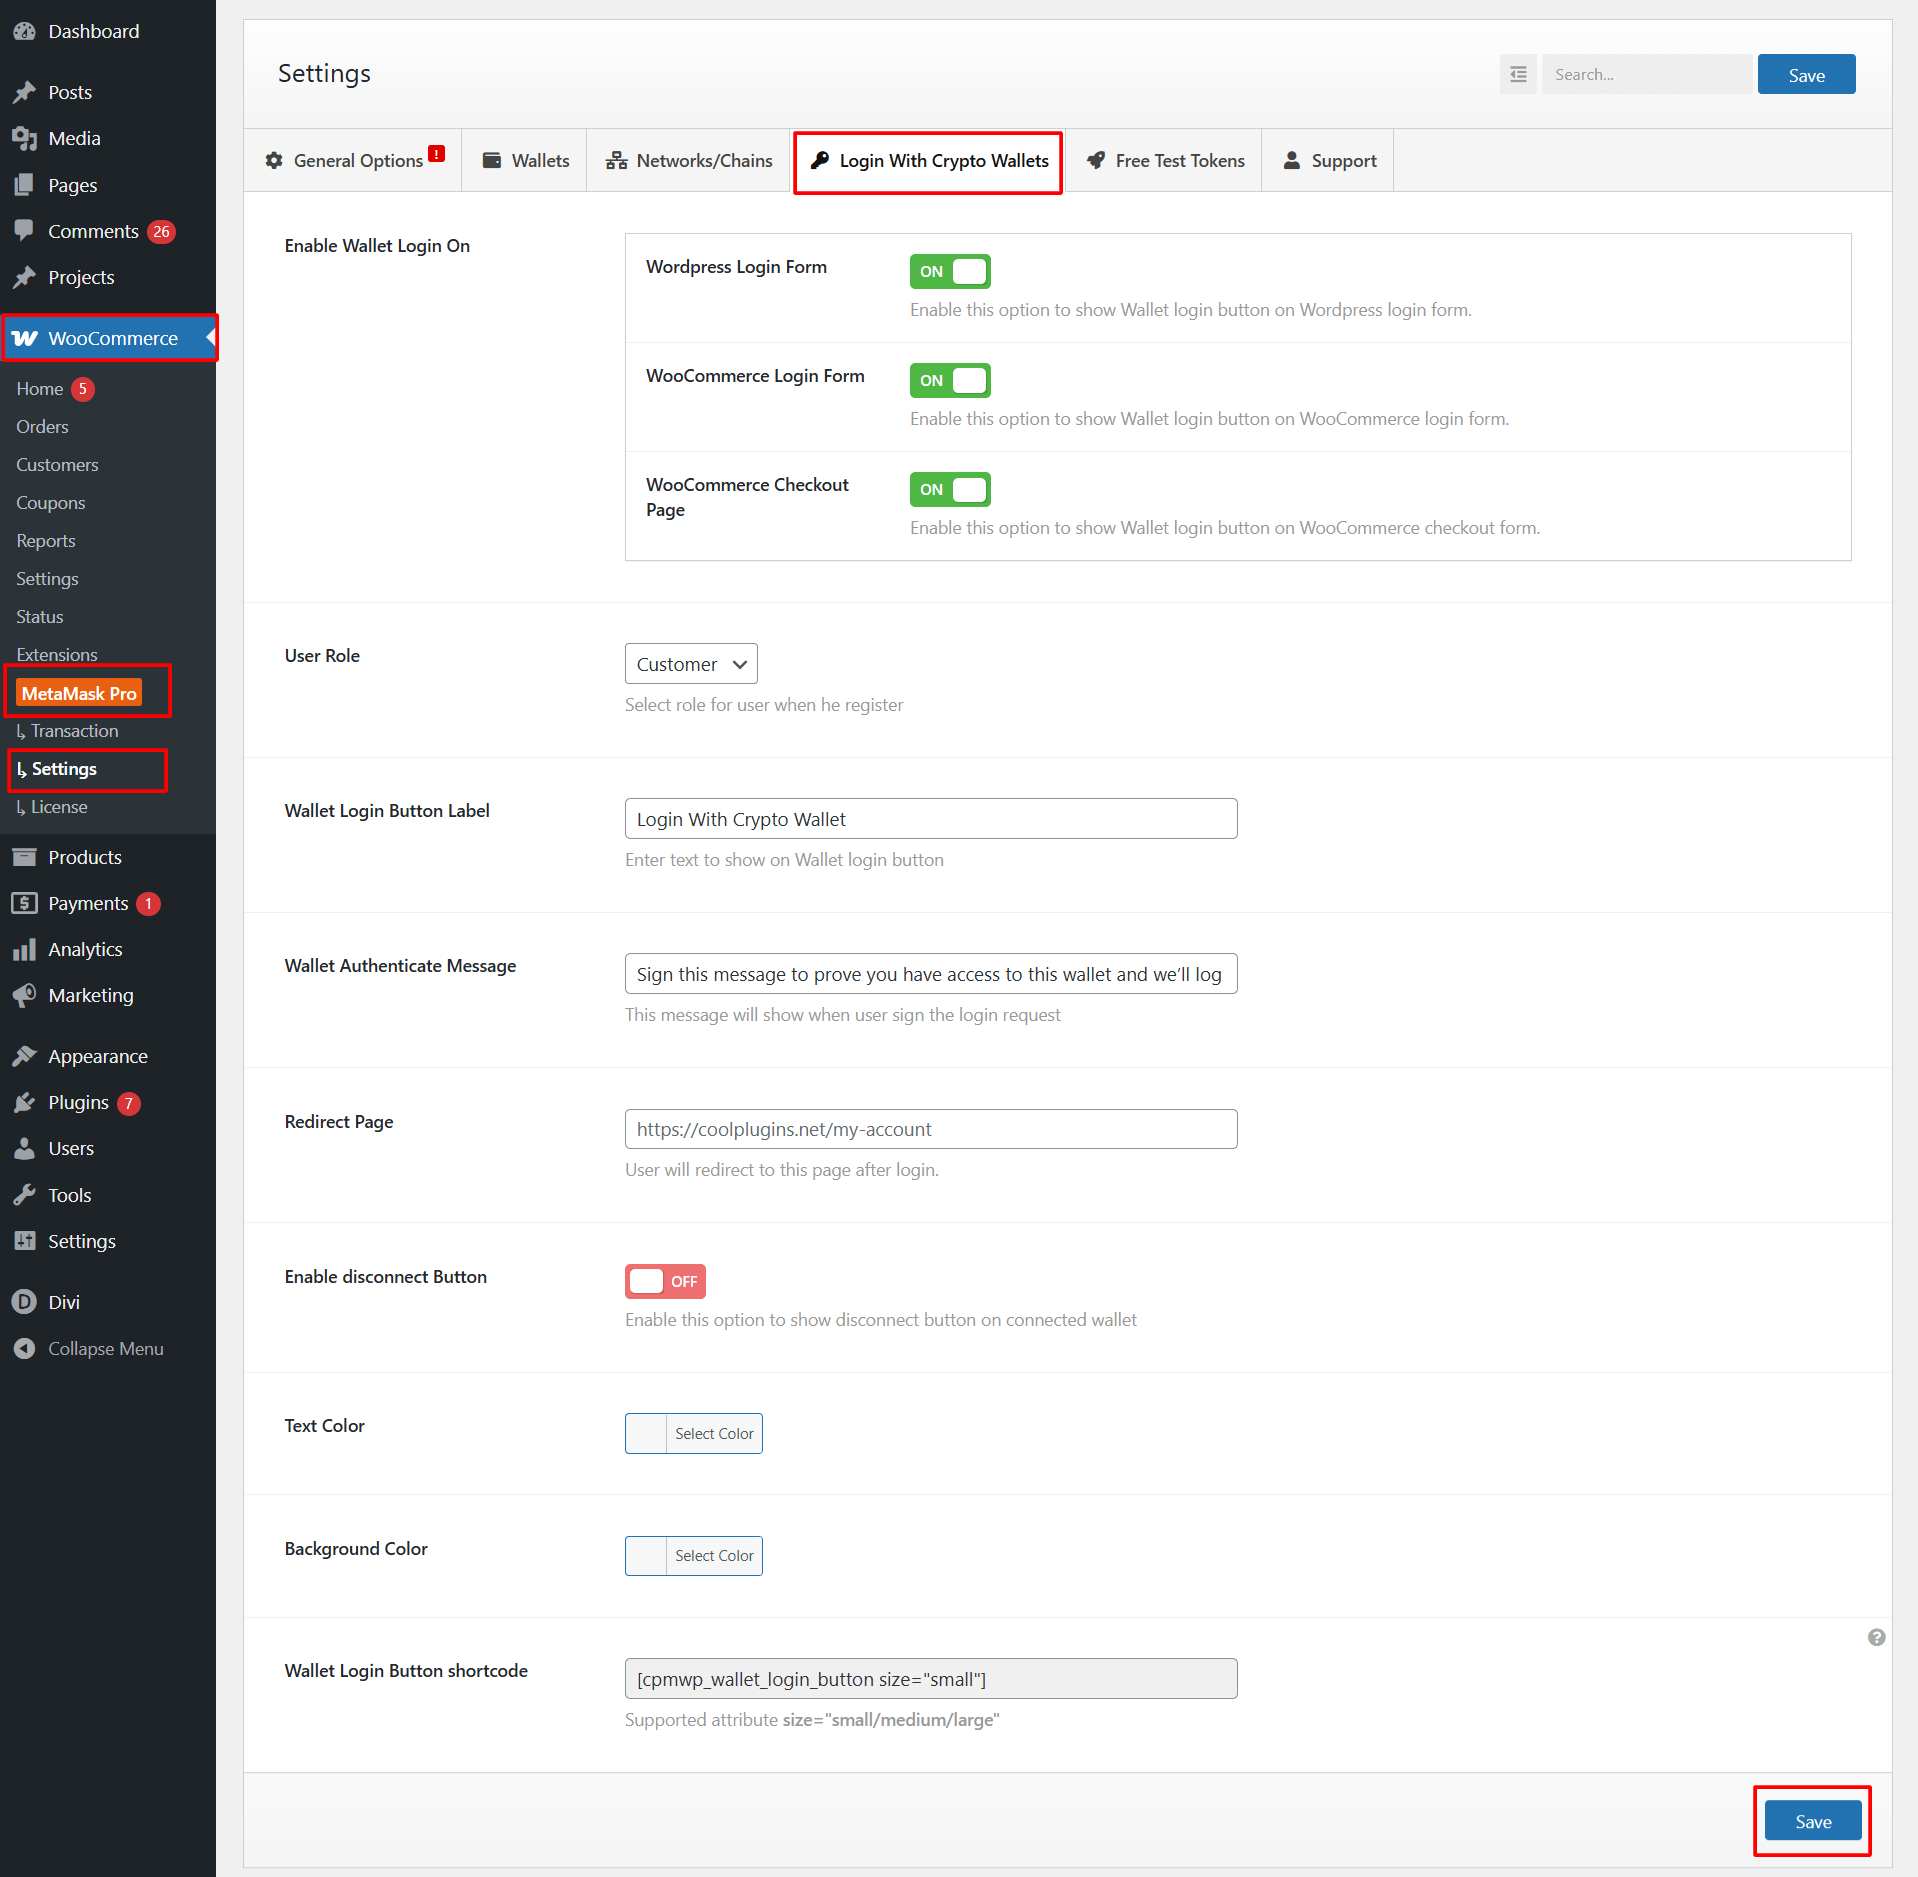
- Enable Wallet Login On: You can choose where the crypto login button should appear on your site.
- WordPress Login Form: Turn this ON to display the wallet login button on the default WordPress login page.
- WooCommerce Login Form: Enable this option to show the crypto login button on the WooCommerce “My Account” login page.
- WooCommerce Checkout Page: Turn this ON if you want buyers to log in with their wallet directly on the checkout page.
- User Role: Choose the default user role for new users who register using a crypto wallet.
- Wallet Login Button Label: Enter the text you want to display on the wallet login button.
- Wallet Authenticate Message: This is the message that appears inside the wallet (MetaMask, Trust Wallet, etc.) when the user signs the login request.
- Redirect Page: Enter the page URL where users will be redirected after successfully logging in with their crypto wallet.
- Enable Disconnect Button: Turn this ON if you want to show a disconnect option, allowing users to manually disconnect their active wallet from the interface.
- Styling Options: Customize the design of your wallet login button according to your website’s style.
- Wallet Button Shortcode: Use this shortcode to display a “Login with Wallet” button anywhere on your website.
After satisfied, click Save to apply the changes.