The Networks/Chains/Tokens section allows you to manage which blockchain networks your WooCommerce store will support for cryptocurrency payments. You can enable or disable networks, edit network settings, change RPC details, configure the main currency, and add custom tokens for each chain.
Follow the steps below to access Networks/Chains settings:
- From your WordPress dashboard, navigate to WooCommerce > MetaMask Pro > Settings > Networks/Chains.
- Available networks list will appear.
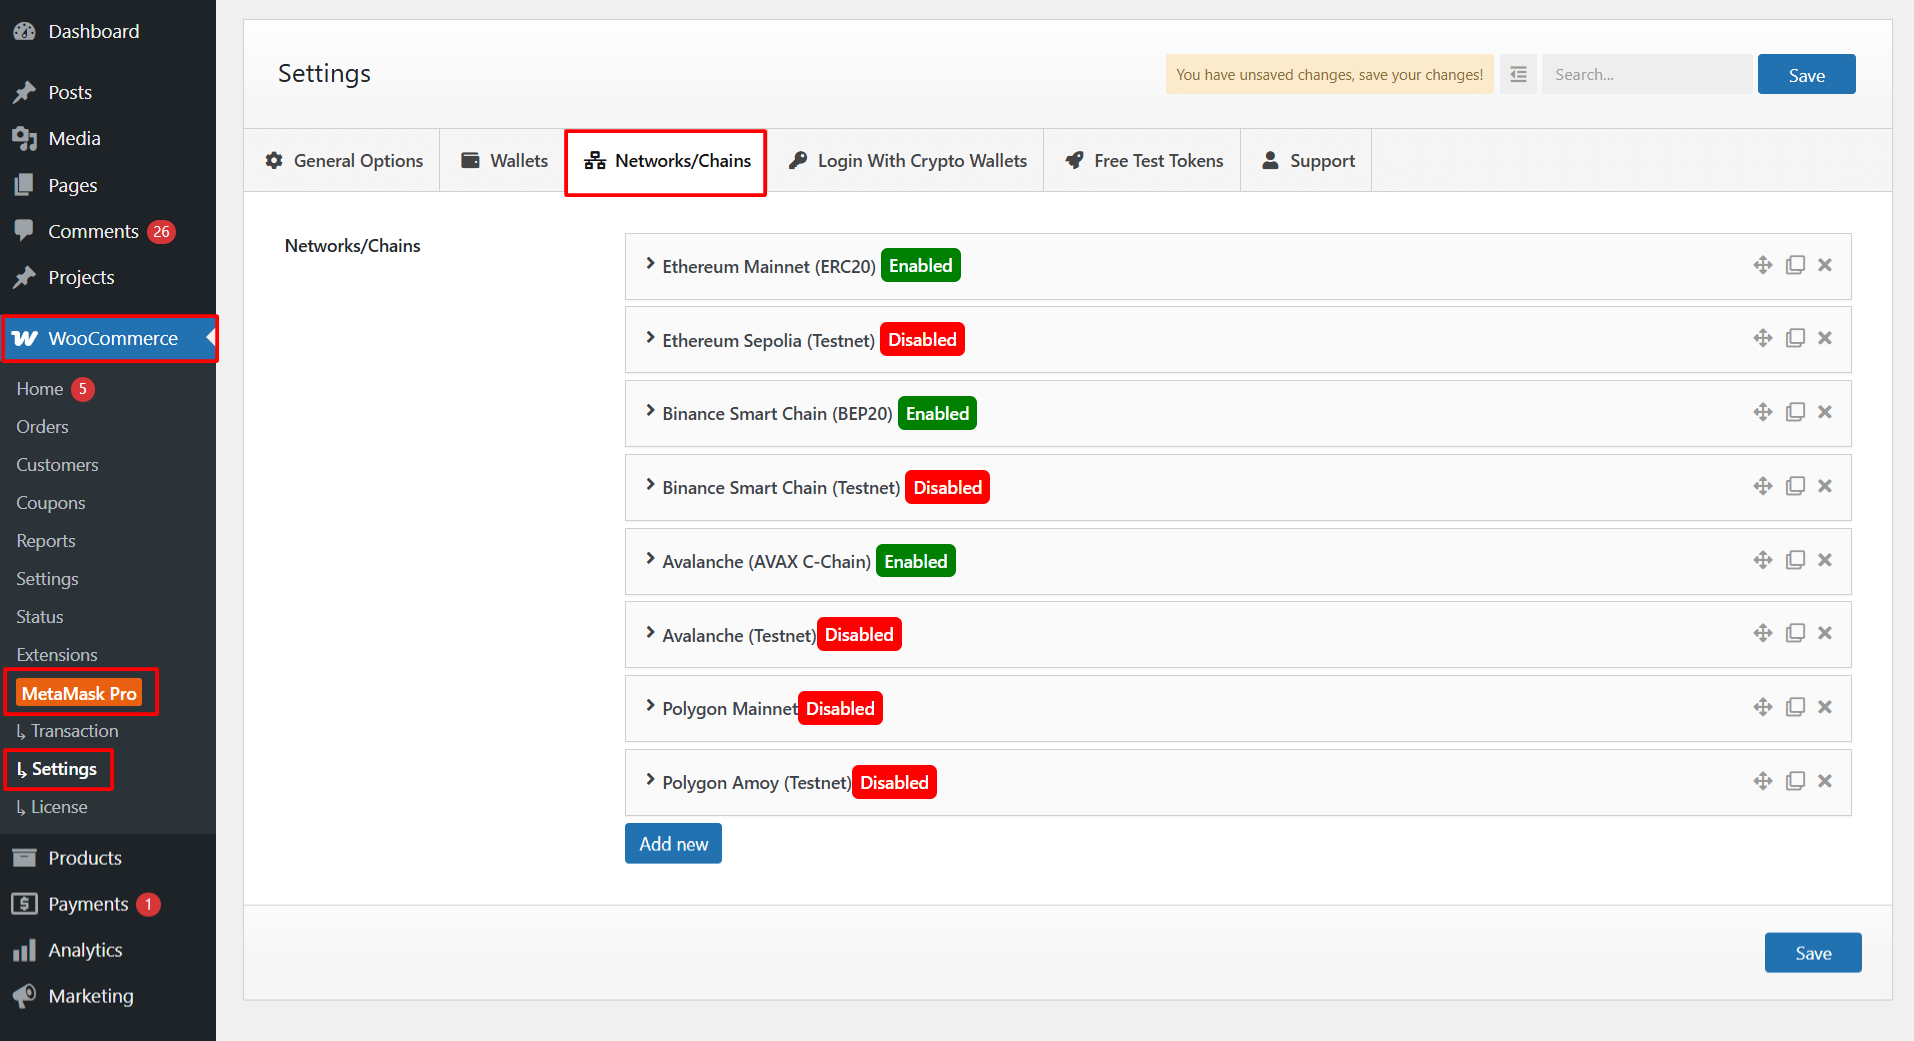
- You can easily enable or disable the available networks.
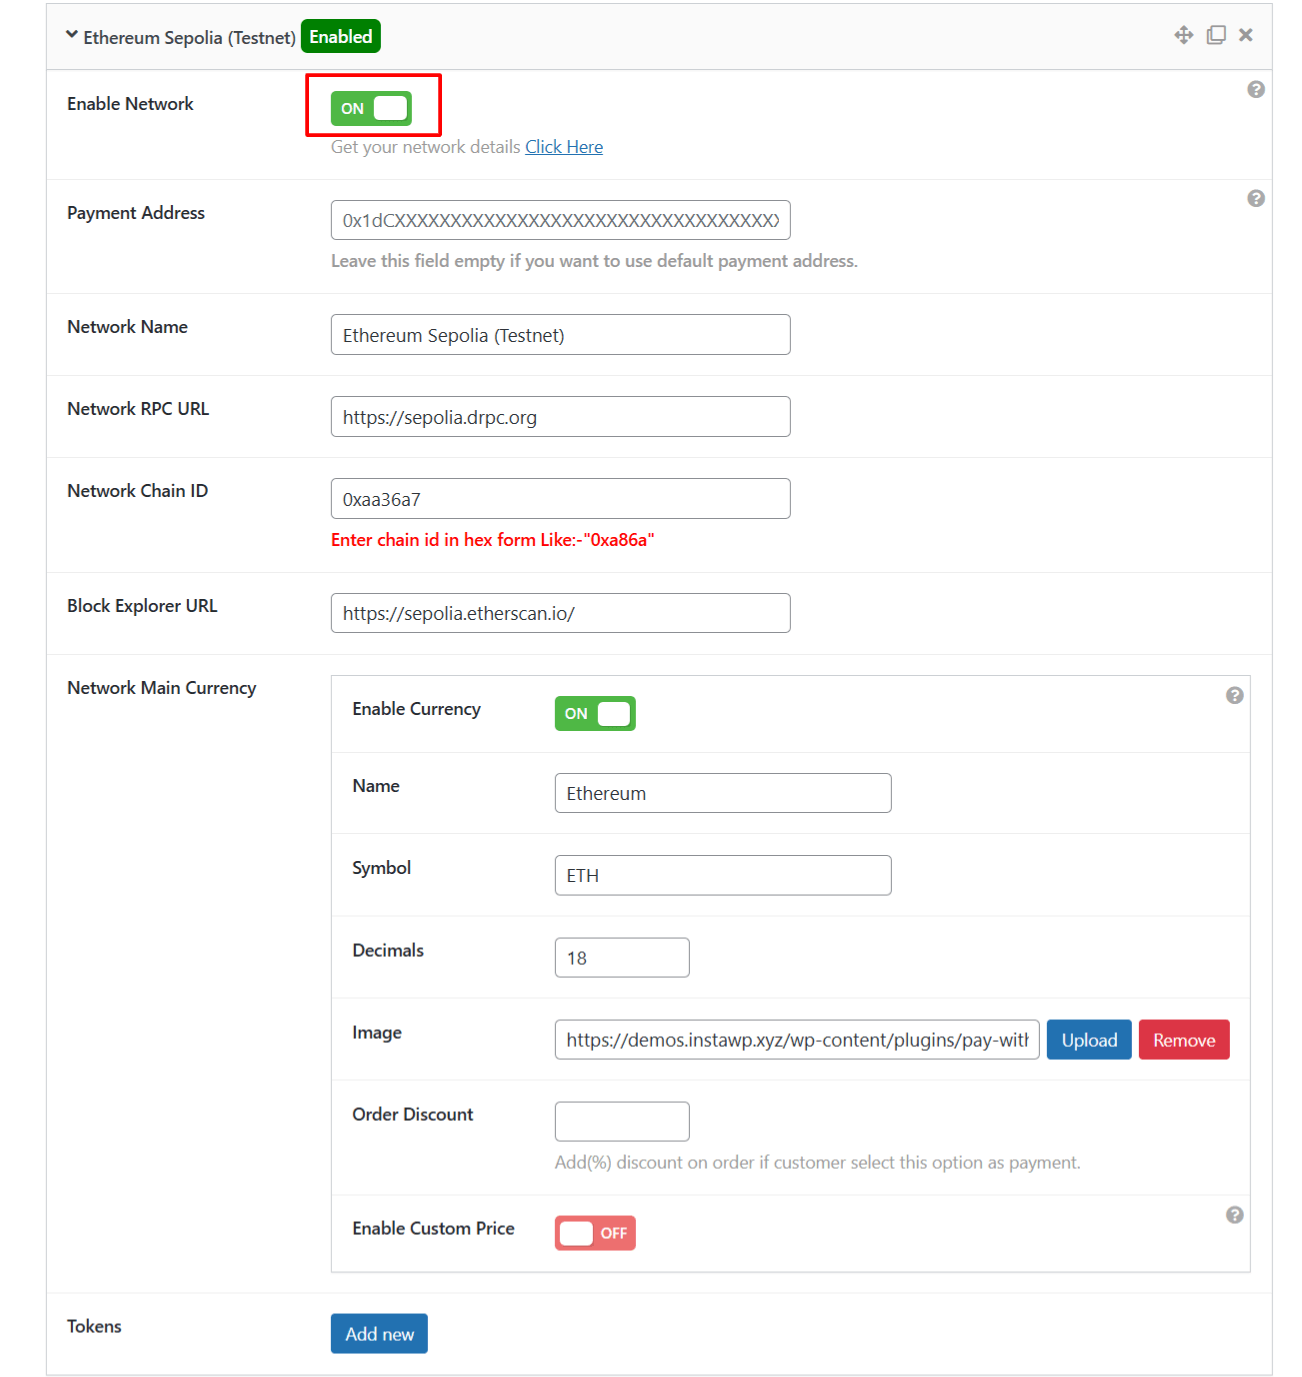
- Click on a network row to expand settings and toggle Enable Network to ON.
- Payment Address: Enter a separate wallet address if you want this network to receive payments in a different wallet. Leave it blank if you want to use the default address from General Options.
- Network Name: Enter the display name of the network so customers can easily recognize which chain they are paying on.
- Network RPC URL: Paste the RPC URL you want the plugin to use for connecting to the blockchain and to verify a valid translation.
- Network Chain ID: Enter the chain ID in hex format, so the wallet can correctly identify the selected blockchain.
- Block Explorer URL: Add a block explorer link, so customers can view their transaction details after checkout.
- Network Main Currency:
- Enable Currency: You can enable or disable the main currency by using this button.
- Name: Enter the name of your currency.
- Symbol: Enter the symbol of your currency.
- Decimals: Specify the number of decimal places supported by the currency.
- Image: Upload an image for your currency.
- Order Discount: Enter the discount in percentage (%).
- Custom Price: Enable this option and give a custom Price.
- Tokens: Each network includes a Tokens section. Click “Add New” to add a token.
After satisfied, save your changes.